Introduction: Firebase CLI
According to the github page of the firebase-tools project, the firebase cli can be used to:
- Deploy code and assets to your Firebase projects
- Run a local web server for your Firebase Hosting site
- Interact with data in your Firebase database
- Import/Export users into/from Firebase Auth
The web console is fine for a lot of stuff.
But let’s see what we can do with the CLI, and let’s check what we CANNOT do without it.
Installation
Ok, easy.
Assuming you have npm installed, run the following command:
npm install -g firebase-tools
You will now have the command firebase, globally.
Now, run:
firebase login
to authenticate to your Firebase account (this will open your browser).
Firebase tasks
Seleting projects
List your firebase projects:
firebase list
You can then select one of them with
firebase use <project>
Cloud Functions Log
A common thing you would like to do is looking at the logs.
This is possible with:
firebase functions:log
At this point I think there is no way to “listen” for changes in the log, that would be a very useful feature.
The
gcloud app logs tail
sadly does not help here, even if the current selected project is the firebase one.
If you have some tips about it, I will be more than happy to edit this article.
Configuration
The functions configuration is handled through some commands:
firebase functions:get|set|unset|clone
to retrieve|store|remove|clone project configuration (respectively).
Emulate locally
Running
firebase functions:shell
will let you choose which of your functions to emulate locally.
You can then choose the method (get/head/post/put/patch/del/delete/cookie/jar/default) and the test data to start the emulation.
Delete functions
You can then delete one or more cloud functions with:
firestore functions:delete <function_name>
Deploy and serve locally
To serve your project with cloud functions locally, you can run:
firebase serve
When you’re ready to deploy your firebase project, you can run:
firebase deploy
Accounts management
With the firebase cli you can both import and export Firebase accounts with the:
firebase auth:import|export <file>
Surprisingly enough, import import accounts from a file, and and export will export accounts to a file.
Database
I will skip this part. It’s very well documented everywhere in the firebase ecosystem.
Firestore
Here we are.
What we can do with Firestore with our CLI? Almost nothing, I am afraid.
Right now you have only two things we can accomplish.
But we can use gcloud and gsutil to perform other operations, lick exporting / importing data.
Be sure to be logged in with
gcloud auth login
If you are already logged in with different accounts, you can list the accounts with
gcloud auth list
and select one (if the one you need is not the active one) with
gcloud config set account myaccount@gmail.com
At this point, let’s select our project.
gcloud projects list
to list all the projects and
gcloud config set project project_name
to select our project.
Exporting data
First of all, we need a Storage Bucket.
gsutil ls
to see the list of possible buckets to use.
Let’s say that we want to export our data to gs://myproject-abcd.appspot.com/ :
gcloud firestore export gs://myproject-abcd.appspot.com/
You can even export only some collections:
gcloud firestore export gs://myproject-abcd.appspot.com/ --collection-ids=[COLLECTION_ID_1],[COLLECTION_ID_2]
Importing data
You can imagine it, right?
gcloud firestore import gs://myproject-abcd.appspot.com/2019-12-23T23:54:39_76544/
The operation takes some time (proportional to the data size that has to be imported). You can safely close your terminal, the operation will continue.
Checking operations status
Import and export can take time (import takes time even with a very small database).
To list the operations:
gcloud firestore operations list
And you will see something like:
done: true
metadata:
  '@type': type.googleapis.com/google.firestore.admin.v1.ImportDocumentsMetadata
  endTime: '2019-12-23T15:48:03.747509Z'
  inputUriPrefix: gs://myproject-abcd.appspot.com/2019-12-23T23:54:39_76544
  operationState: SUCCESSFUL
  progressBytes:
    completedWork: '2601'
    estimatedWork: '2601'
  progressDocuments:
    completedWork: '8'
    estimatedWork: '8'
  startTime: '2019-12-23T15:47:25.089261Z'
name: projects/myproject-abcd/databases/(default)/operations/AiAydsadsadsadsadVhZmVkBxJsYXJ0bmVjc3Utc2Jvai1uaW1kYRQKLRI
response:
  '@type': type.googleapis.com/google.protobuf.Empty
Indexes (read)
You can look at your indexes:
firebase firestore:indexes
This will list the indexes in a JSON-form of array of objects described as the following one:
    {
    "indexes": [
      {
      "collectionId": "<collection_id>",
      "fields": [
        {
          "fieldPath": "<field_name_one>",
          "mode": "ASCENDING|DESCENDING"
        },
        {
          "fieldPath": "<field_name_two>",
          "mode": "ASCENDING|DESCENDING"
        }
      ]},
      {..}
    ]}
We cannot perform other operations over indexes.
Collections and documents: delete recursively
It’s easy from the web console to delete a document, and it’s easy to do it programmatically.
It’s easy on the CLI, too.
But the nightmare of the web console (and of the programmatic approach, too) is that it does not exist a simple and fast way to recursively delete a collection.
This is luckily possible with the CLI.
You can recursively delete a collection by using:
firebase firestore:delete --recursive <collection>
Bonus: delete all collections
Now, assuming you are testing something and your firestore is full of garbage, you might want to start from scratch deleting every collection.
This is possible running:
firebase firestore:delete --all-collections
If you are looking at your database in the firebase console, please remember to refresh if the UI is not updated (that means that you still see the root collections).
Conclusion
This concludes the article for now.
I hope that the Firestore-side will be developed with other features and commands, because right now is very limited.
One of the most feature I can think of, generally speaking, would be the chance to “tail” logs in the shell.
I would be more than happy if someone can integrate with useful tools and additional stuff.
The post Exploring Firebase CLI with some Firestore tips appeared first on L.S..


 google.com – Intents


 La DUCC-IT 2017 si terrà a Vicenza il 6 e 7 maggio prossimi. Ubuntu-it, la comunità italiana di Ubuntu, annuncia la Debian/Ubuntu Community Conference Italia 2017 (in breve DUCC-IT 2017), l'incontro delle comunità italiane di Debian e di Ubuntu in programma nei giorni 6 e 7 maggio 2017,
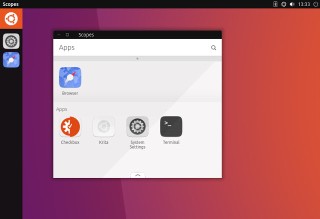
 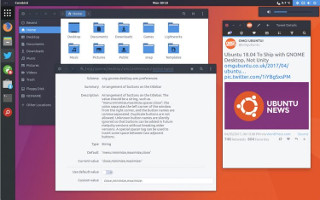 In tutto questo panorama, tanti utenti hanno deciso di passare immediatamente al futuro desktop di default e di cercare di renderlo il più possibile simile al buon vecchio Unity. Uno dei punti di forza della shell di GNOME è dato dalle estreme possibilità di customizzazione che questo ambiente mette a disposizione dei suoi utenti, grazie a semplici estensioni è possibile mutare l'aspetto e i comportamenti di ogni singolo componente della sua interfaccia. Rendere GNOME simile a Unity è estremamente semplice dal punto di vista estetico, mentre sul lato delle funzionalità non tutte quelle fornite dall'HUD di Unity sono, al momento, replicabili sul desktop di GNOME.
 Sul lato tecnico, Ubuntu 17.04 non avrà più necessità di partizioni di swap della dimensione di almeno due volte quella della RAM. Non ha più molto senso su sistemi moderni dotati di molta memoria ed è per questo che verrà utilizzato un file di swap con una politica di dimensionamento completamente diversa. Ubuntu 17.04 include il kernel Linux 4.10, che è una grande notizia per tutti coloro che utilizzano CPU AMD Ryzen o sistemi Intel Kaby Lake. I giocatori invece apprezzeranno molto anche l'utilizzo di MESA 17.0.2 e del server X.Org 1.19.2 incluso per impostazione predefinita.